

The full lotus is the posture people picture when they picture meditation. Its benefits are real. It is also, for most beginners, the wrong place to start — and forcing it is the most reliable way to injure yourself in an activity that is otherwise about as dangerous as sitting on a chair.
This guide covers what every seated posture has in common, the postures themselves in order of difficulty, the specific risk the lotus carries, and four stretches that build the hip flexibility it actually requires.
What every posture has in common
Whichever posture you settle on, these apply.
The back
Upright but relaxed, and the shoulders with it. Use the height and angle of your cushion to help: raising it makes staying upright easier, but puts more load on the knees, so look for the height that suits you. Try not to lean against a backrest.
A well-set spine keeps the mind more awake. It holds off drowsiness, improves concentration, and lets the breath move freely. You will lose the position without noticing, usually to an old habit; when you notice, simply return to it, as many times as it takes.
The head
As important as the back. The head tilts very slightly forward. Too far and you lose the balance of the posture and drift toward drowsiness; too far back, chin up, and you tip toward agitation. Find the middle. The head should rest comfortably, almost as though floating, with the chin drawn slightly in.
If you are sitting after a long day and feel sleepy, raise the chin a little more than usual to compensate. When you notice it dropping again, put it back.
The hands
The arms need support they do not have to work for. Rest the hands just above the lap so the shoulders can hang; a folded blanket underneath makes this more comfortable. Traditionally the right hand rests on the left, with the thumb tips lightly touching.
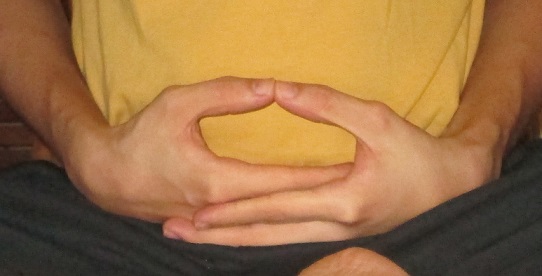
That contact is described in some traditions as a channel for energy. Take that as you like — what is not in question is that it keeps you attentive. When the thumbs drift apart, you have wandered, and restoring them brings you back. The mudra can be held with the thumbs raised into a triangle or resting flat; traditions and practitioners differ. A raised mudra asks slightly more effort to hold, which raises the level of attention with it.
Eyes, tongue, lips
Eyes closed, or open a fraction. Both are correct, and which one depends on tradition and style. If they are open, keep the lids relaxed and the gaze unfocused or directed toward the tip of the nose. (These instructions assume the breath as the object of meditation, ānāpānasati.) If you are tired, half-open eyes add a little stimulation and help.
The tongue rests comfortably, its tip against the roof of the mouth or the teeth. The lips meet softly. The brow and the muscles of the face stay loose.
The postures, easiest to hardest
They are listed in order of difficulty. Understand that in terms of the goal of the practice they are all equally good, so do not spend any anxiety on which one you use.
On a chair
Used when an injury or a physical condition makes floor sitting impractical, and a sound choice for beginners and for older practitioners without much experience. Find the right chair first: flat seat, straight back, none of the ergonomic contouring.
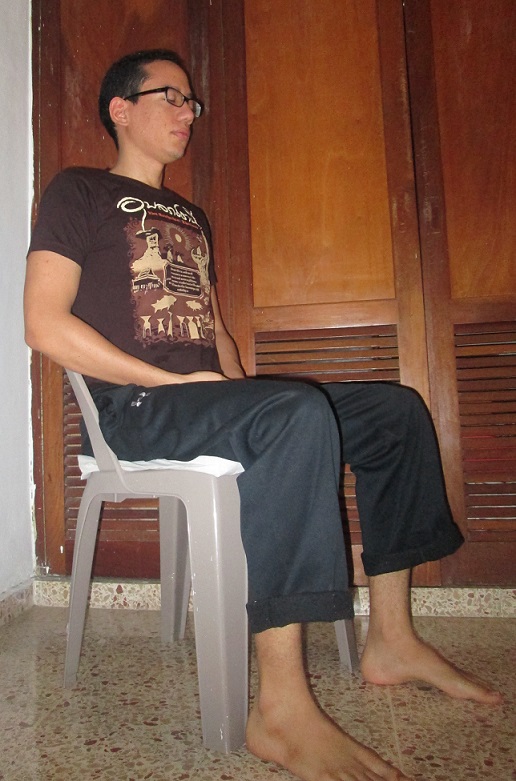
Set the posture from the soles of the feet upward. Feet flat and aligned under the knees, knees aligned under the shoulders, legs bent at roughly ninety degrees. The back as described above, without using the backrest — unless a physical condition means you need it, in which case lean on it a little. Everything else follows the general points.
Seiza
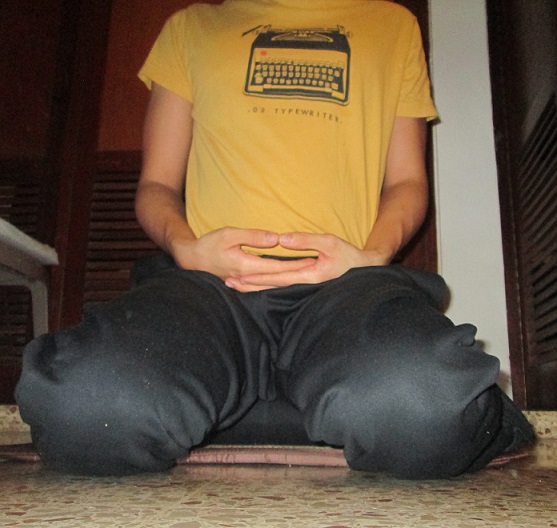
Place a cushion or zafu on the floor, set it between your legs, and sit down on it, folding the legs as if kneeling and resting your weight on the cushion rather than on your heels. The soles of the feet face up; the knees rest comfortably on the floor. Hands, back and head as above.
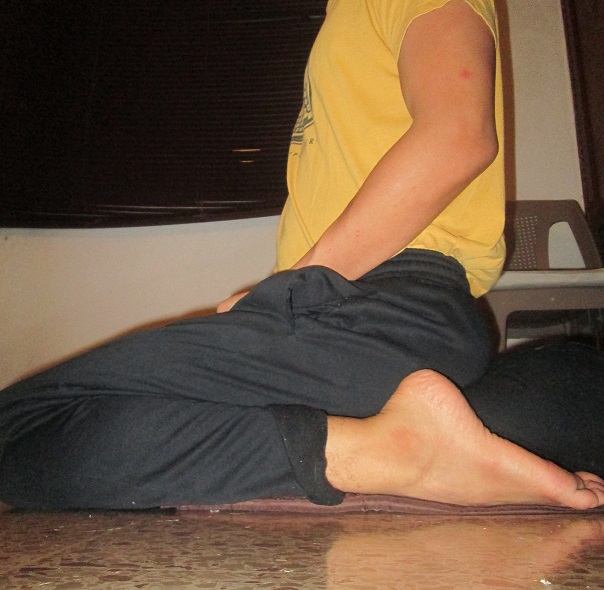
Its advantage is that it asks for very little flexibility. Westerners tend not to have much range in the hips, having spent most of their lives in chairs, in contrast to cultures where sitting on the floor is ordinary. Since what matters most in seated meditation is the spine, crossed legs are not a requirement at all.
Burmese
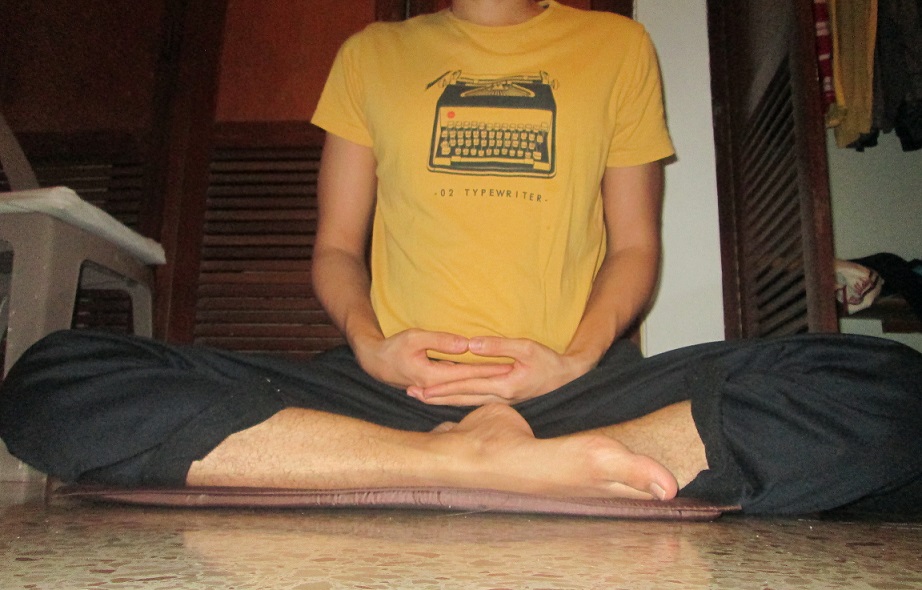
This is the one to use if you intend to work toward the lotus: it is very stable, and it opens the hips while you sit. The legs are folded with one shin placed in front of the other rather than crossed over it. Use a cushion to set the height to suit you, following the general points above.
If you are not yet flexible enough to rest both legs flat on the floor as in the photograph, it does not matter. They can stay suspended, or you can put a support underneath if you feel strain building. The posture itself will increase your range over time and make the next ones available.
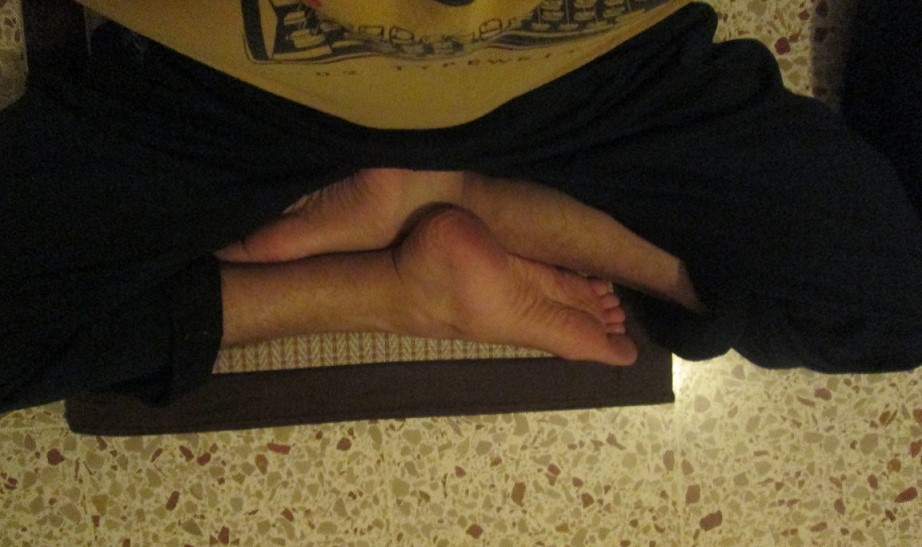
Half lotus and quarter lotus
In the half lotus, one foot rests on the opposite thigh with the sole facing backward, while the other stays below.
To get there safely, start from Burmese. Hold the knee firmly with one hand and the foot with the other, lift the leg while keeping its shape held between your hands, and let all the bending come from the hip. As you lift, rotate inward so the foot arrives on top of the opposite thigh. Set it down and let go.
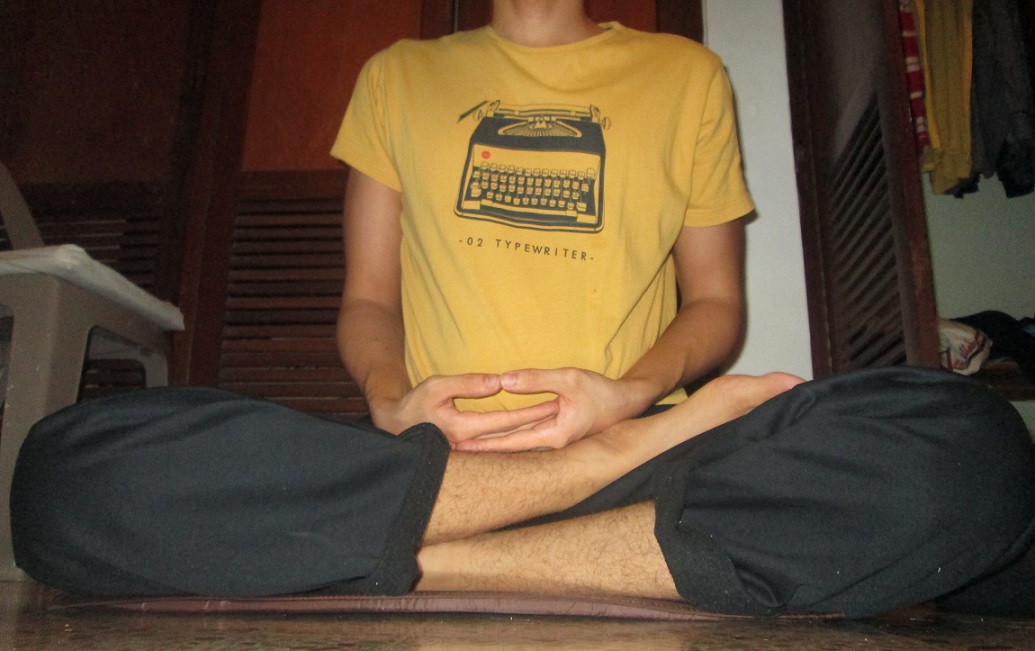
You should be comfortable in it. Discomfort inside the first ten minutes means you are not ready for this posture yet and should take another one. The quarter lotus is the same shape with less flexion — the foot sits slightly outside the thigh rather than fully on it — and is easier.
Full lotus
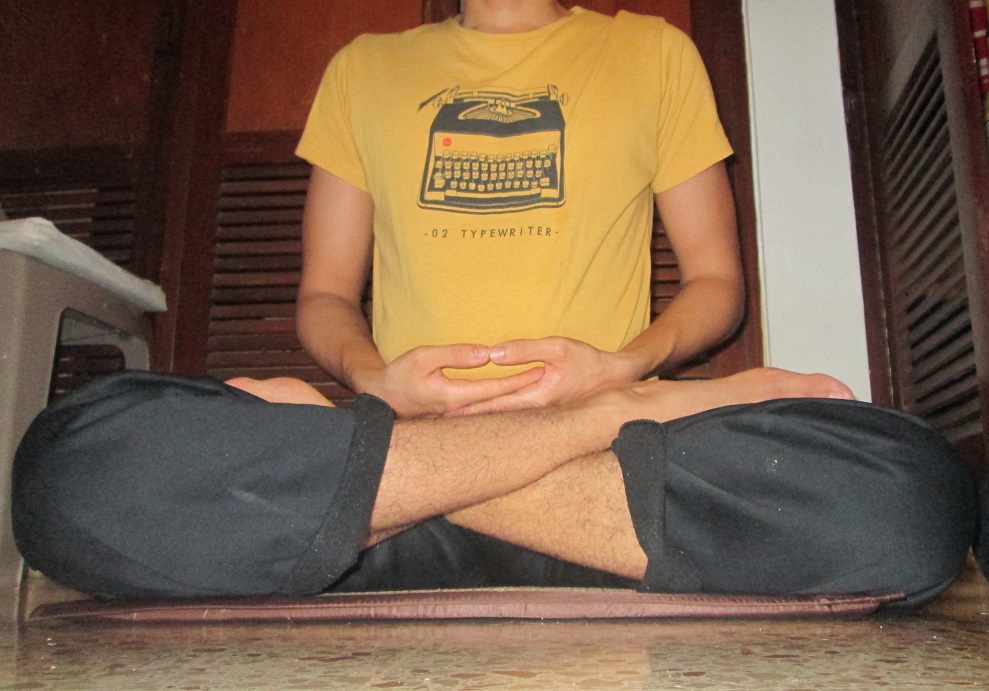
People reasonably ask what the point of mastering the full lotus is when easier alternatives exist. The honest answer is that the best posture is the one that fits you and gives you results. There is no absolute posture, and despite the impression it gives, the lotus is not a sign of mastery.
That said, for those who can hold it properly, the benefits are worth having:
- Three symmetrical points of support — both knees and the seat — which produce good spinal posture naturally, with no effort.
- It strengthens the back.
- It promotes circulation between the legs and the torso.
- It promotes circulation in the lower back and abdomen.
- It calms the mind, relaxes the nervous system and reduces muscular tension.
- Once mastered, it extends how long you can sit without needing to move.
To take it, repeat what you did for the half lotus and then complete the shape with the remaining leg. Traditionally the right leg goes on top of the left.
The lotus can wreck your knees, and the damage can be permanent enough to need surgery. It happens when you push the legs into the shape before the hips are ready, and ignore what the knees are telling you. Without enough range in the hip, you compensate by twisting at the knee joint, which loads it in a direction it was not built for. Over time that destroys the cartilage.
Two checks. First, look at the soles of your feet: they should face backward, not upward. Second, the bend should come from the hip, not the knee. When it is wrong, the ligament on one side of the knee is crushed while the one on the other side is overstretched — in plain terms, your knee hurts. When it is right, the knee is aligned and quiet.
Four exercises to open the hips
These are yoga stretches for the muscles the lotus depends on, principally around the hips. Use a timer, and hold each one somewhere between fifteen and forty-five seconds, whatever suits you.
1. Pigeon stretch
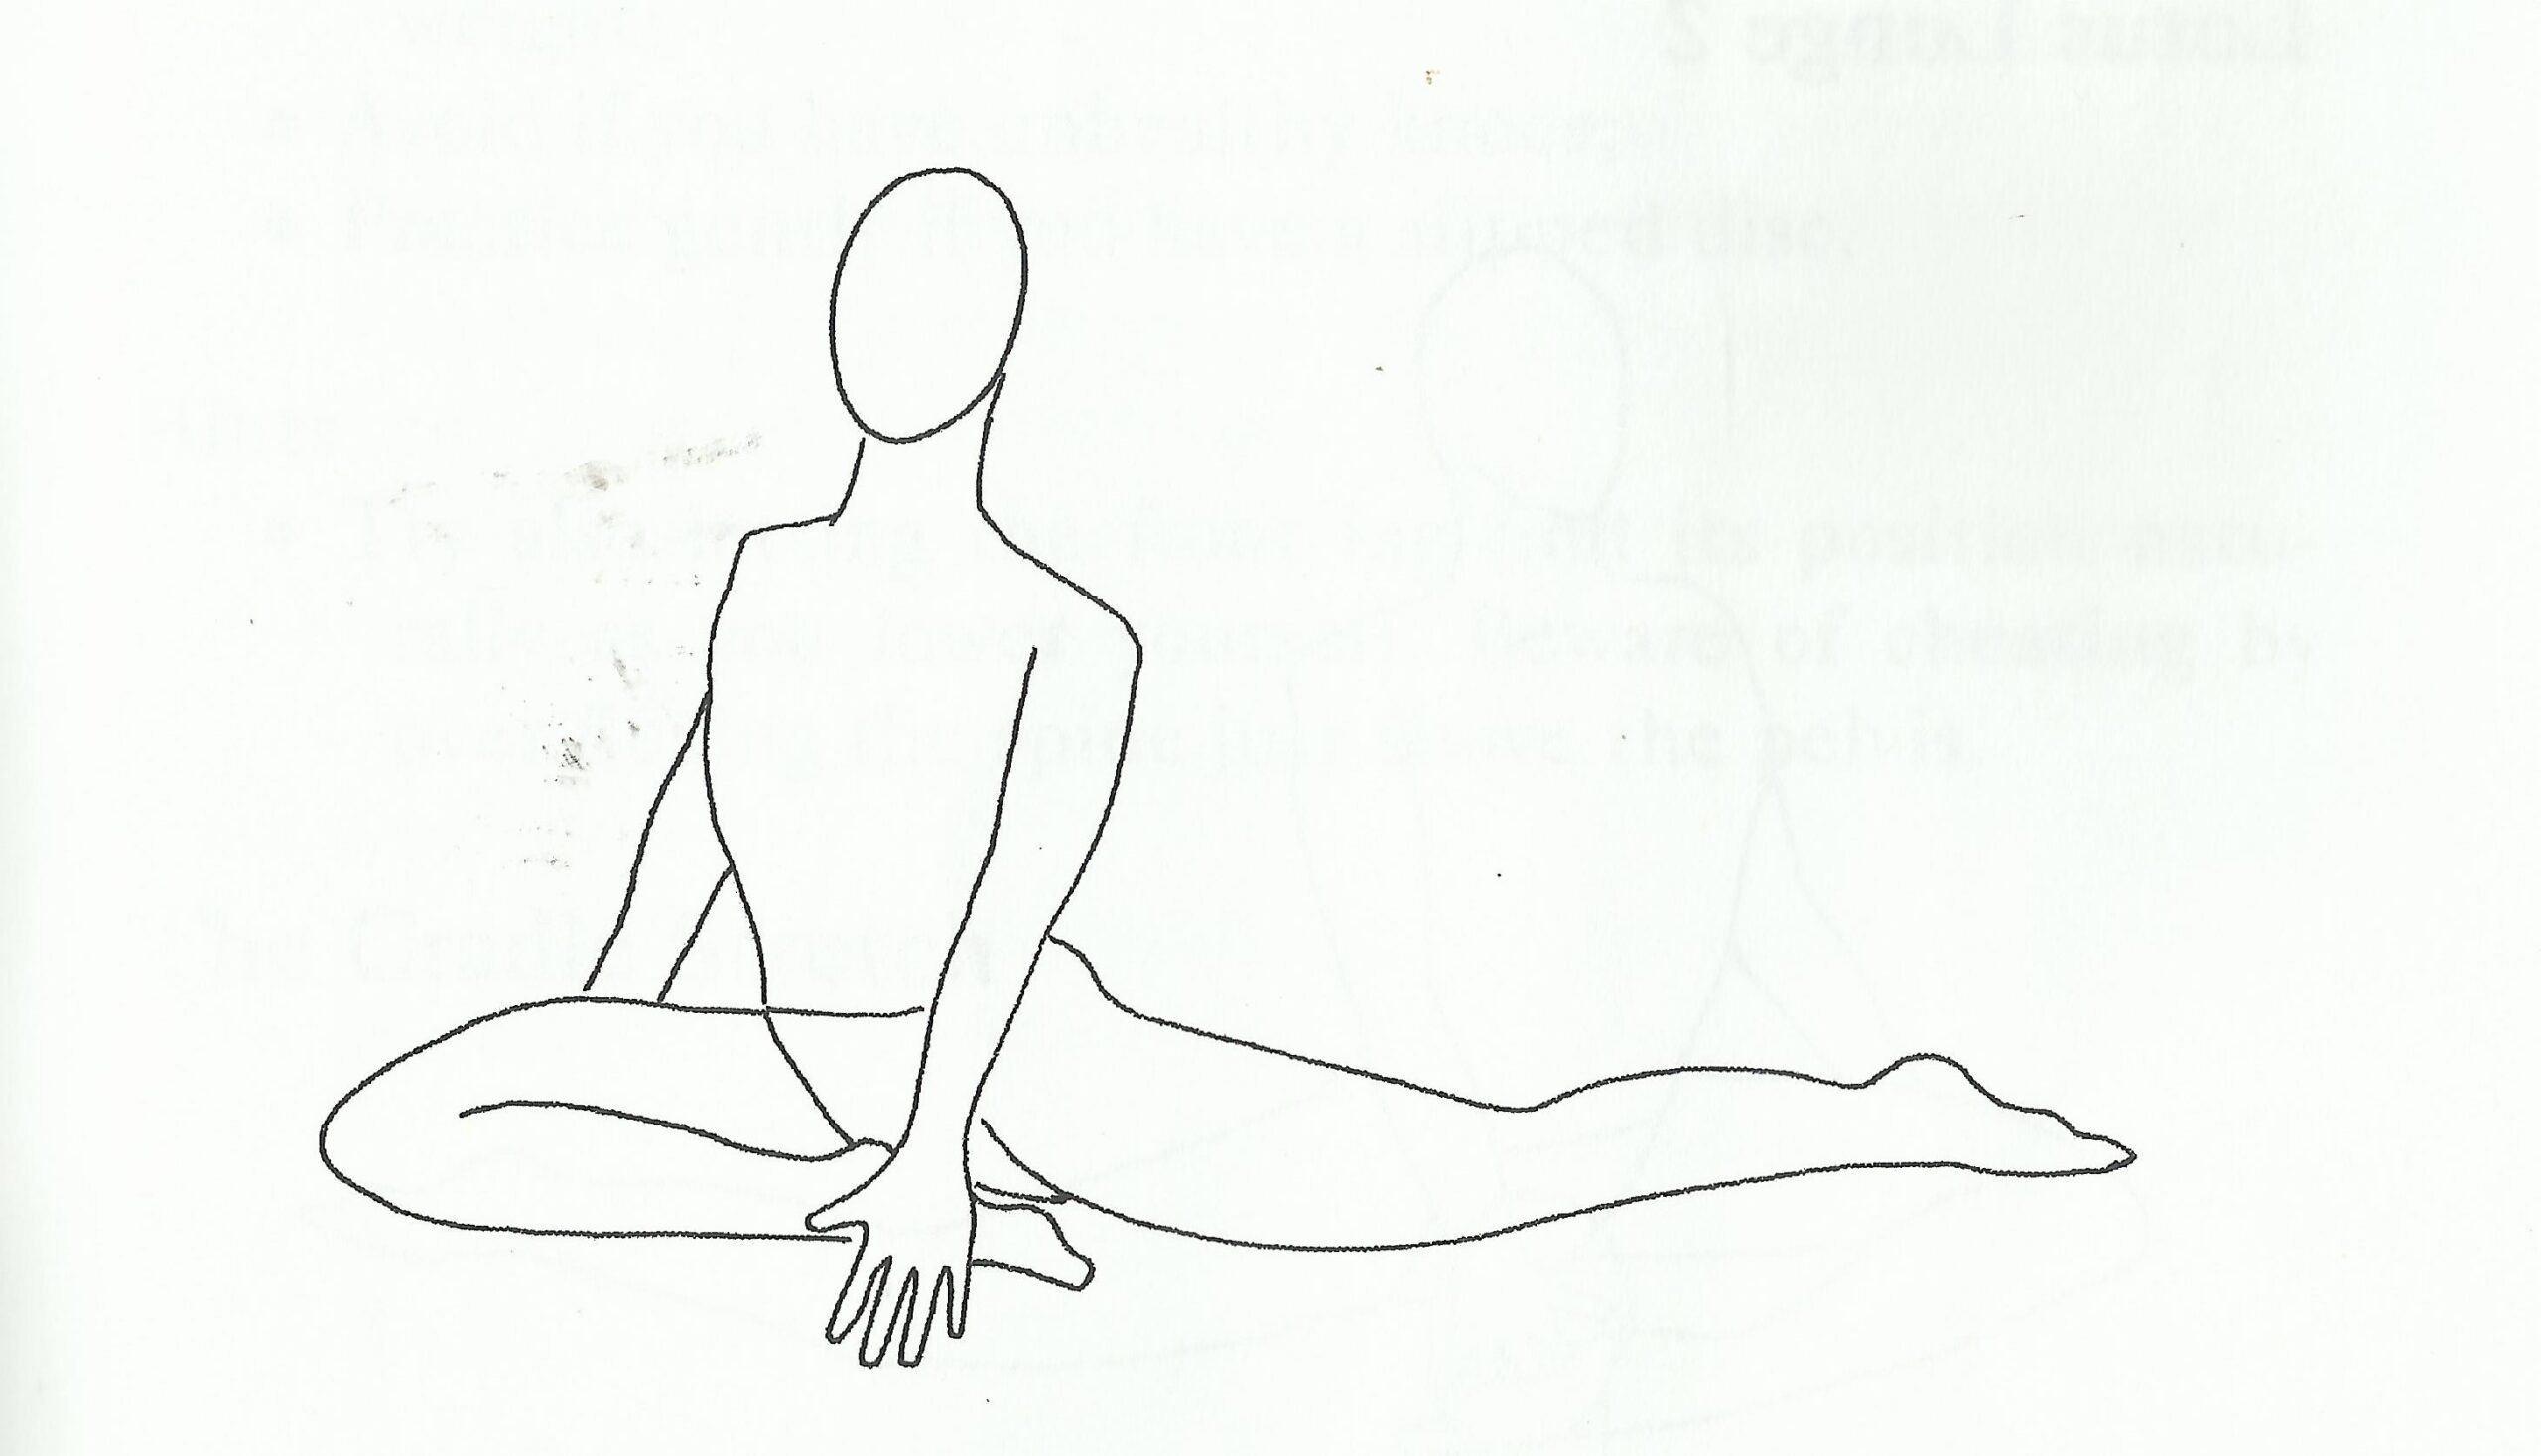
The most important of the four, because it gives you flexibility in exactly the direction the lotus needs. It is an awkward shape at first, so take your time getting it right before moving on to the others.
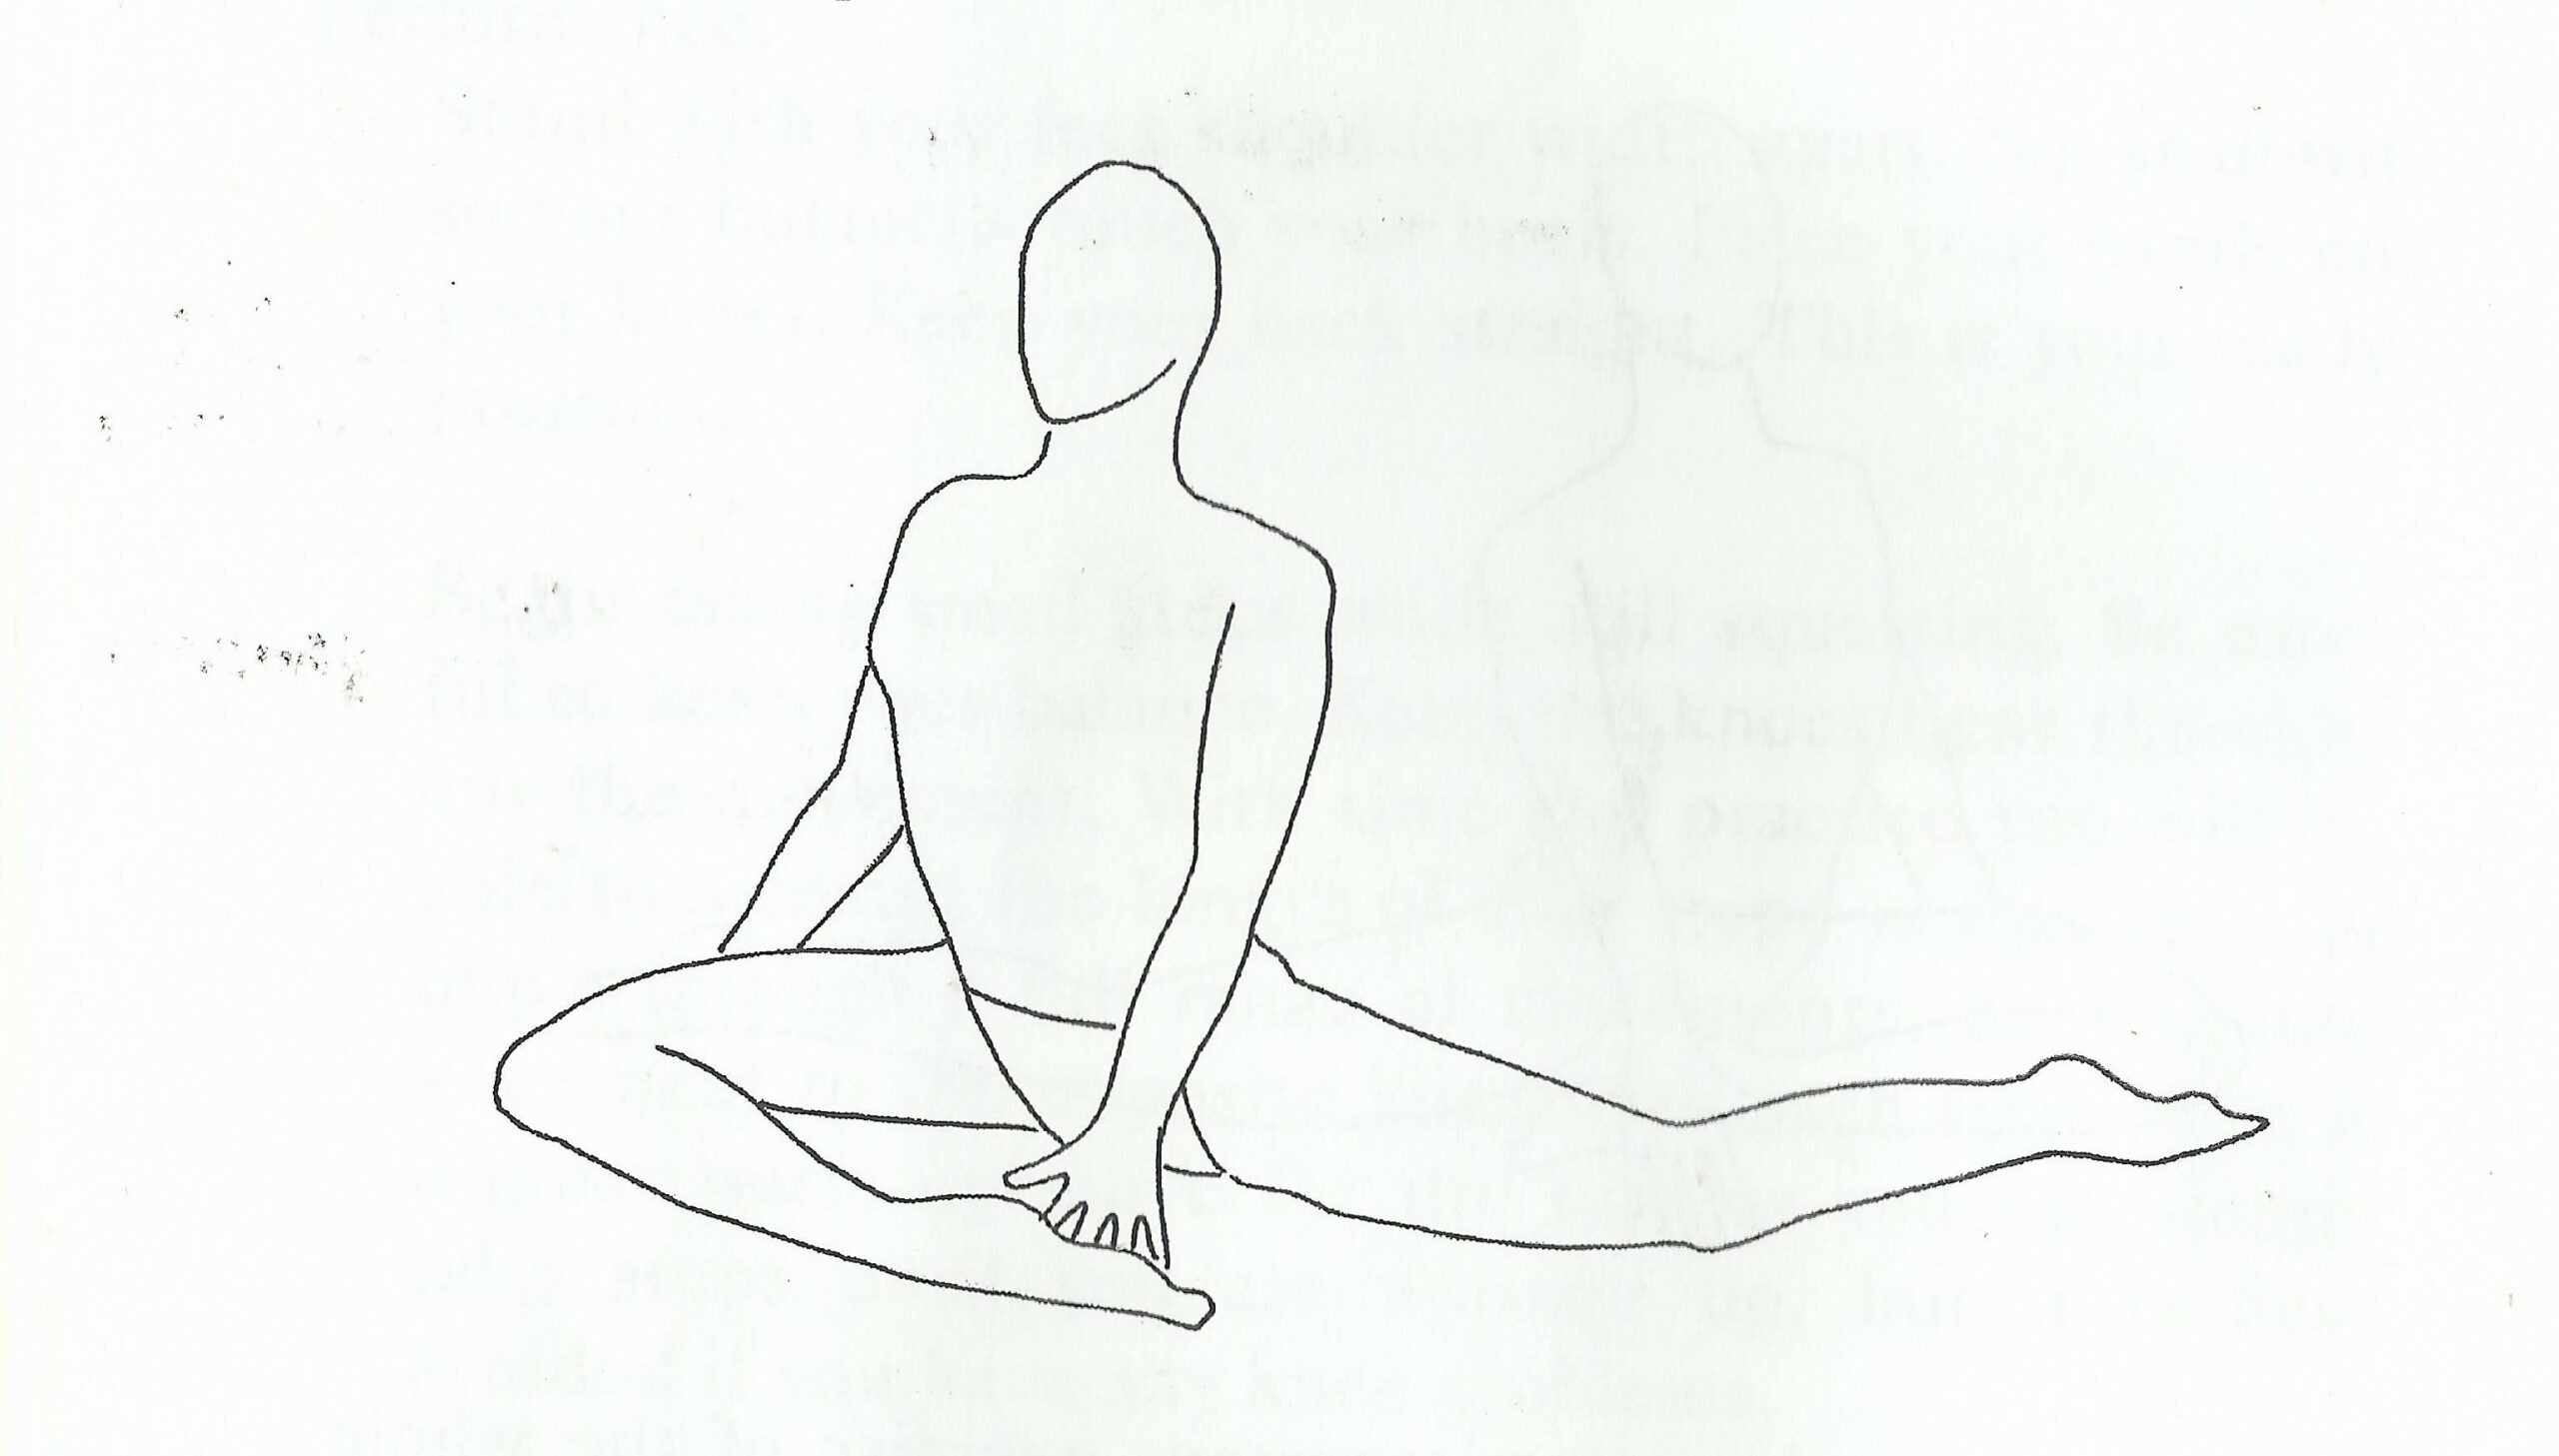
Start standing with your feet about shoulder width apart and come down into a squat. Put your hands on the floor for support and extend your left leg back behind you, sole facing up. Rotate the right leg inward so the heel comes toward the pubic bone (see the photograph), and keep the torso lifted and as upright as you can. You should feel it at the base of the right glute. Then repeat on the other side.
Once that is comfortable, intensify it by moving the foot away from the thigh, opening out to roughly forty-five degrees. Be careful to keep the effort in the hip joint rather than the knee.
2. Cradle stretch
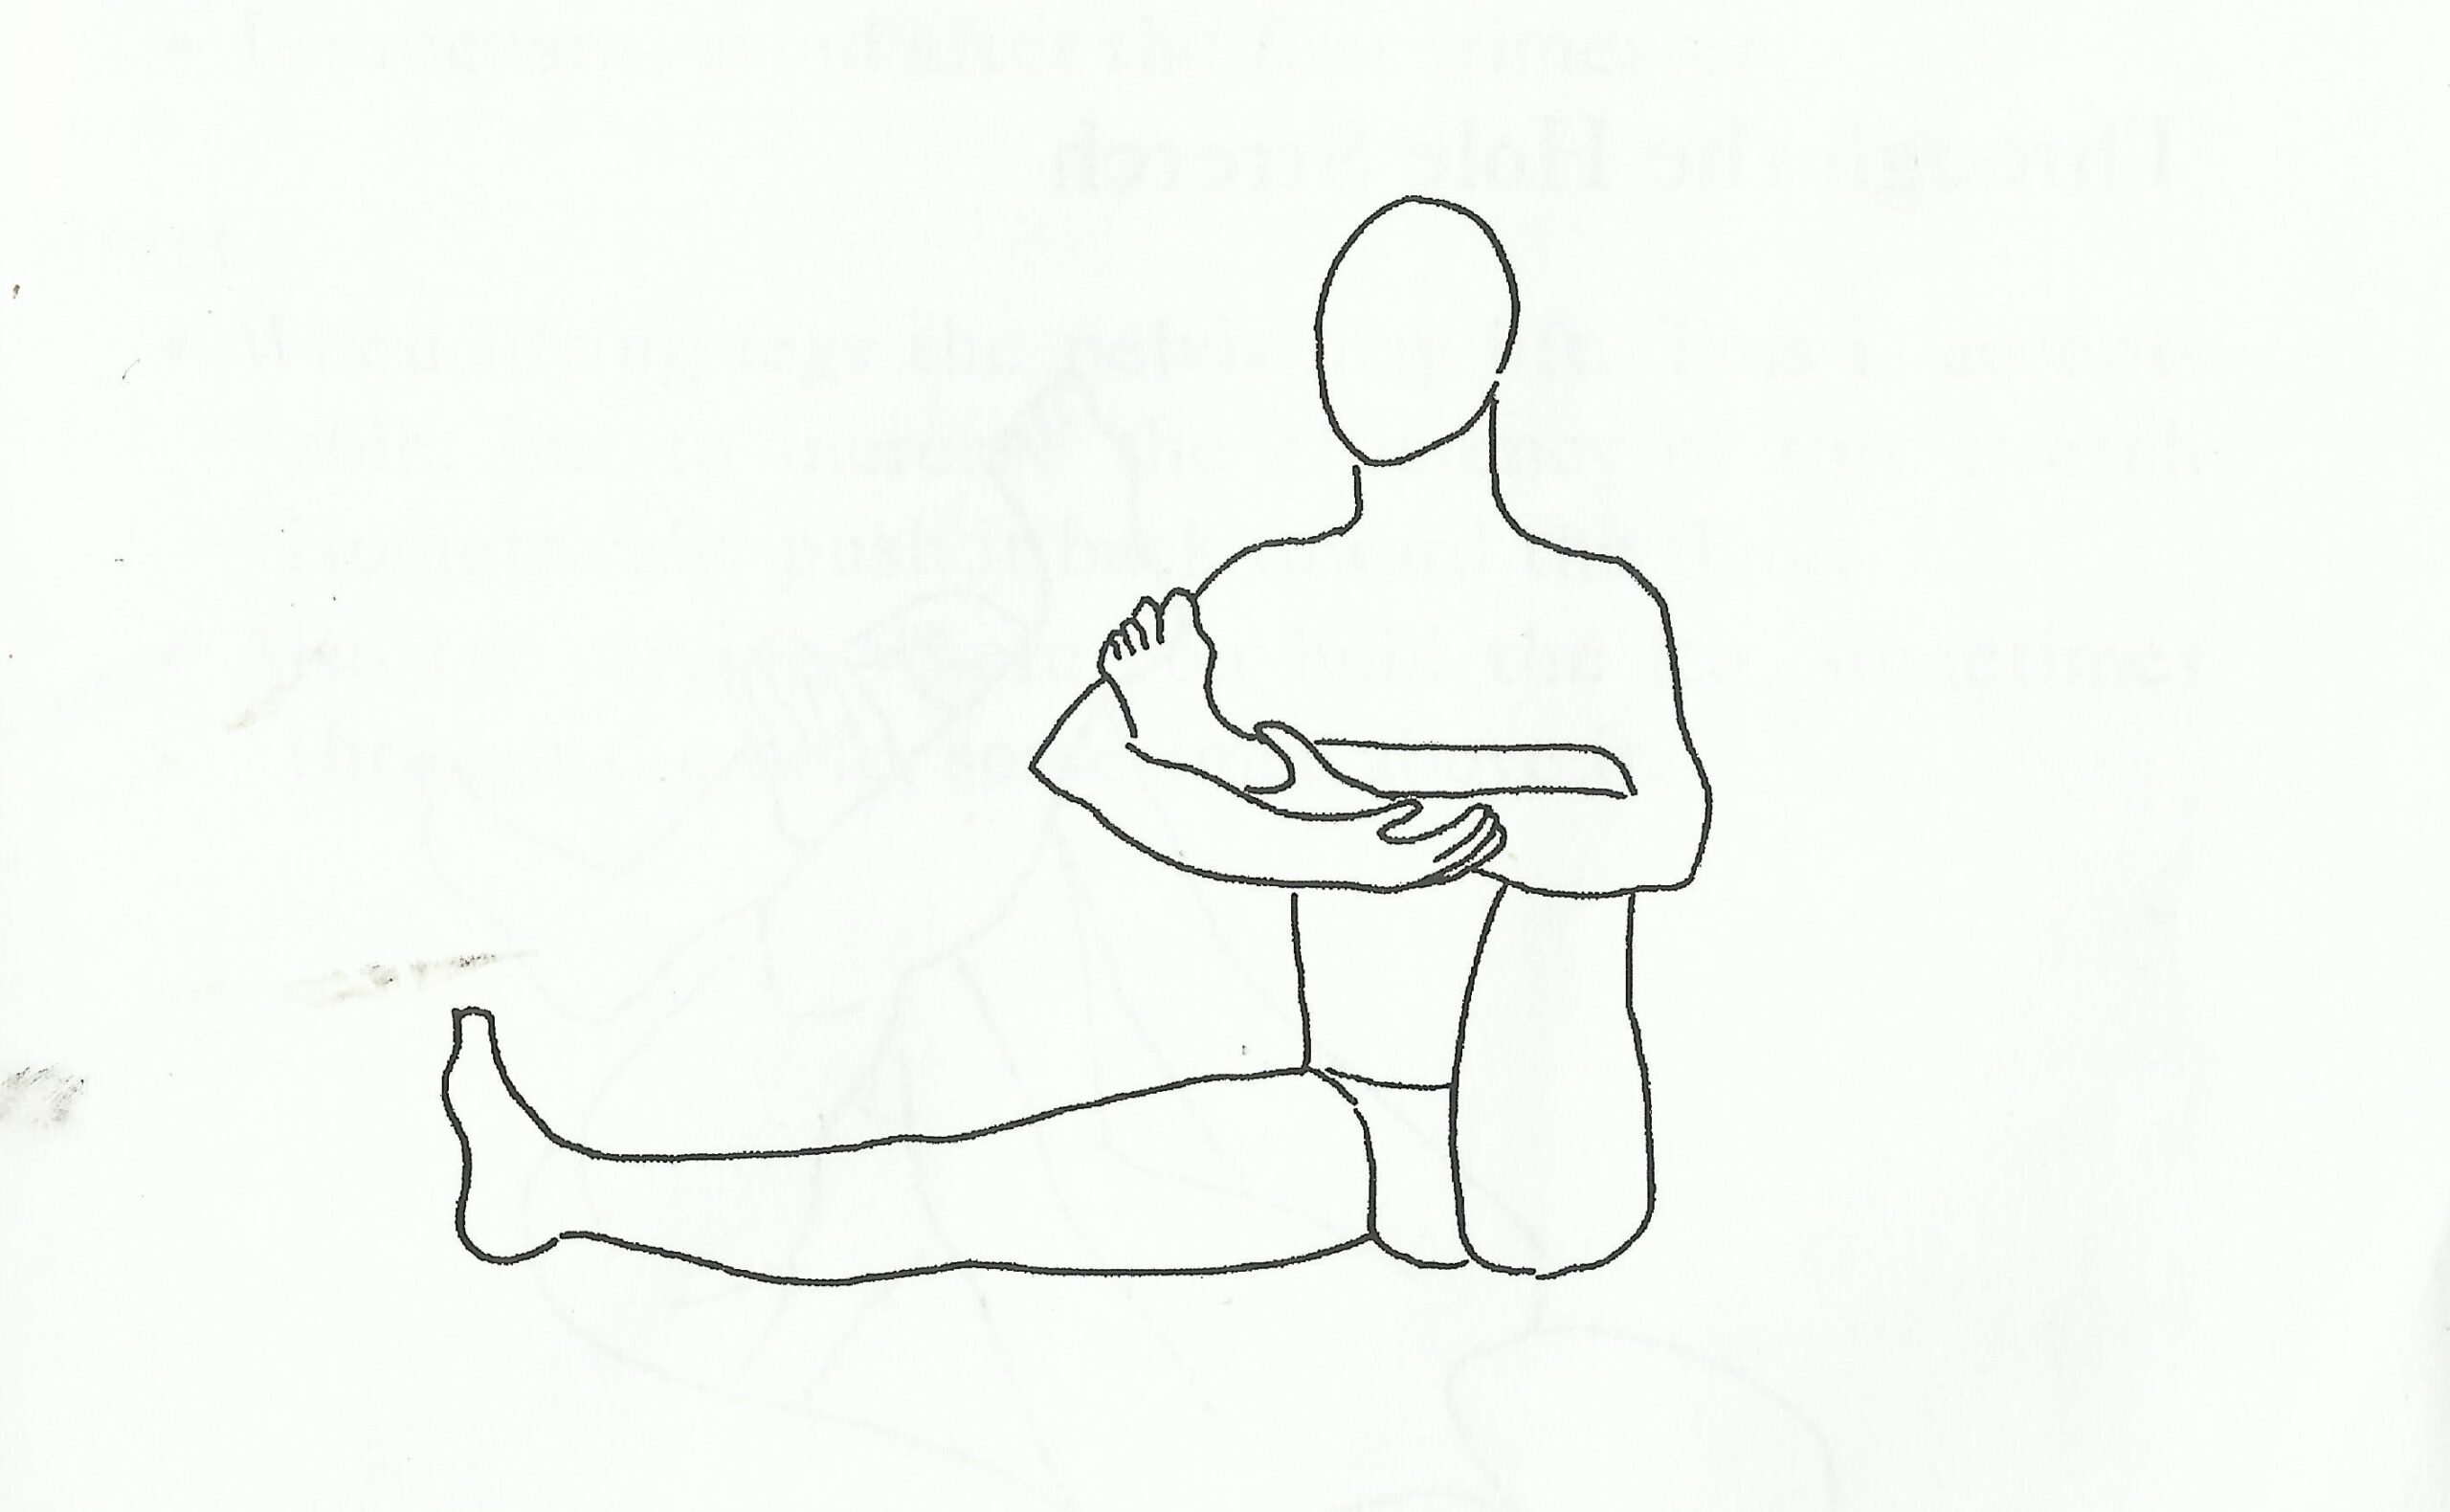
Sit with both legs extended in front of you. Bend the right leg and rotate it outward, then take hold of it: the crook of the left elbow against the sole of the foot, the crook of the right elbow against the knee, hands clasped together. That locks the leg’s position completely, which is what protects the knee. Now draw the cradled leg in toward your chest as if hugging it. Hold, feeling it at the base of the right glute, then repeat with the other leg.
3. Reclining hip stretch
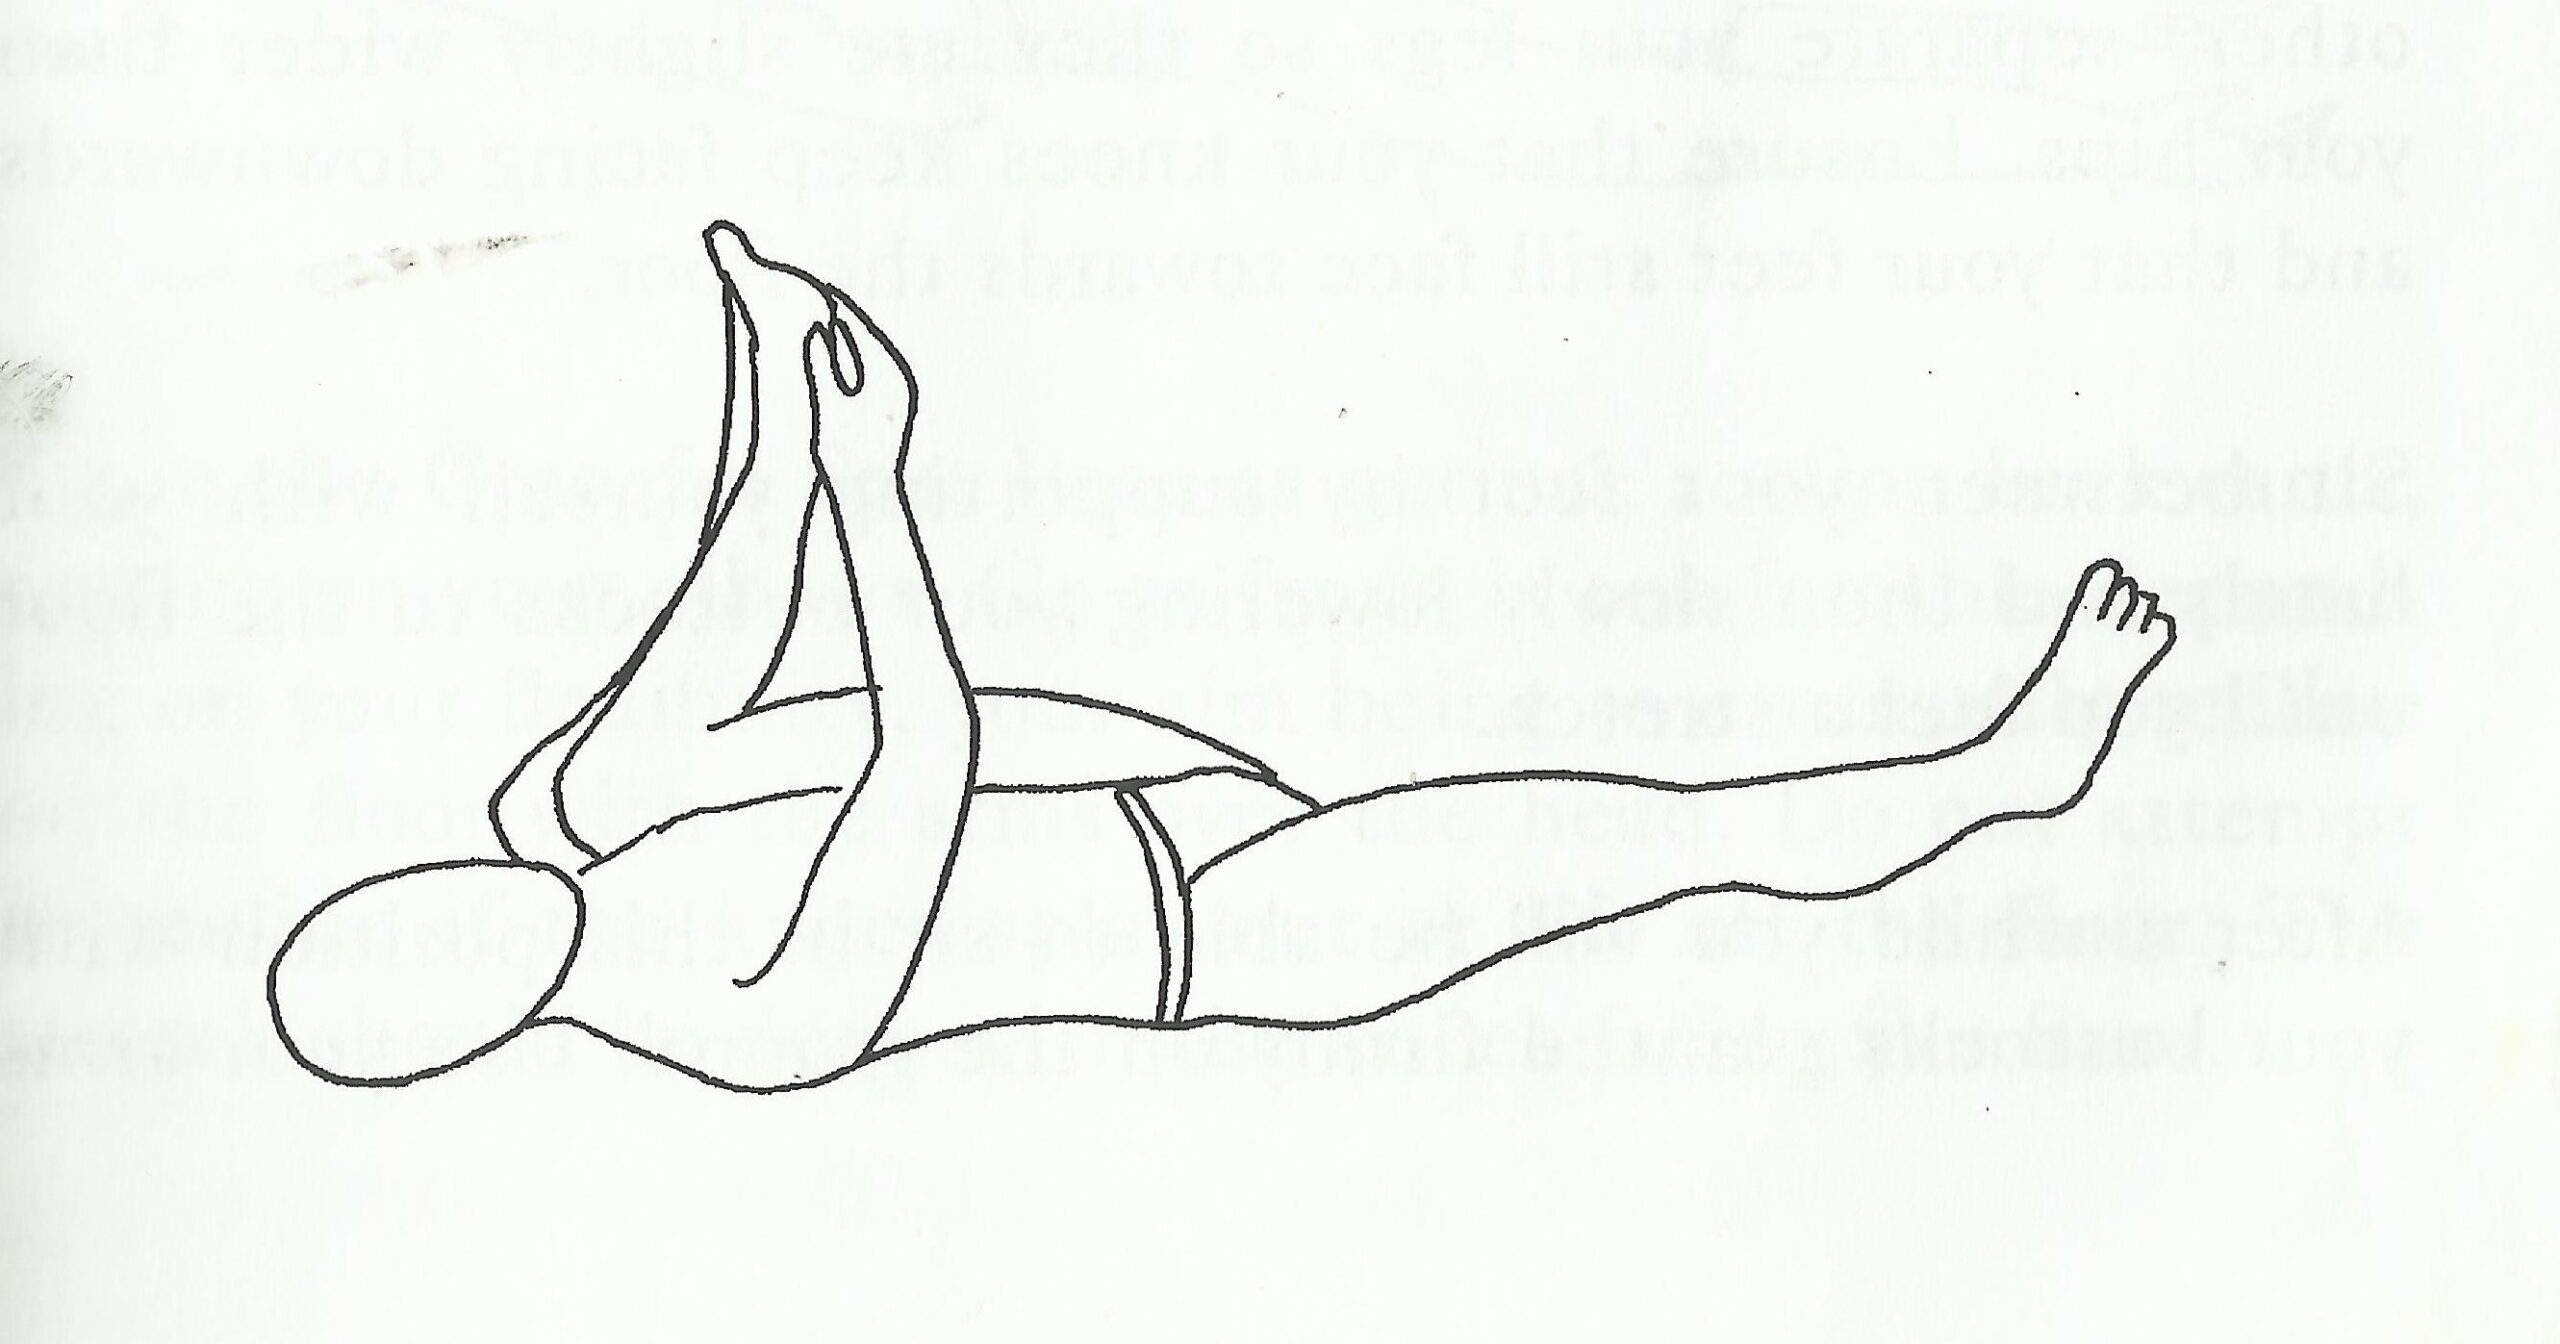
Lie on your back with your legs extended. Bend the right knee and raise the leg so you can get both hands under the sole of the foot. Move the knee in the direction of your right shoulder, hold, and repeat with the other leg. Regulate the pressure with your hands: enough to feel the stretch, not enough to force it.
4. Butterfly stretch
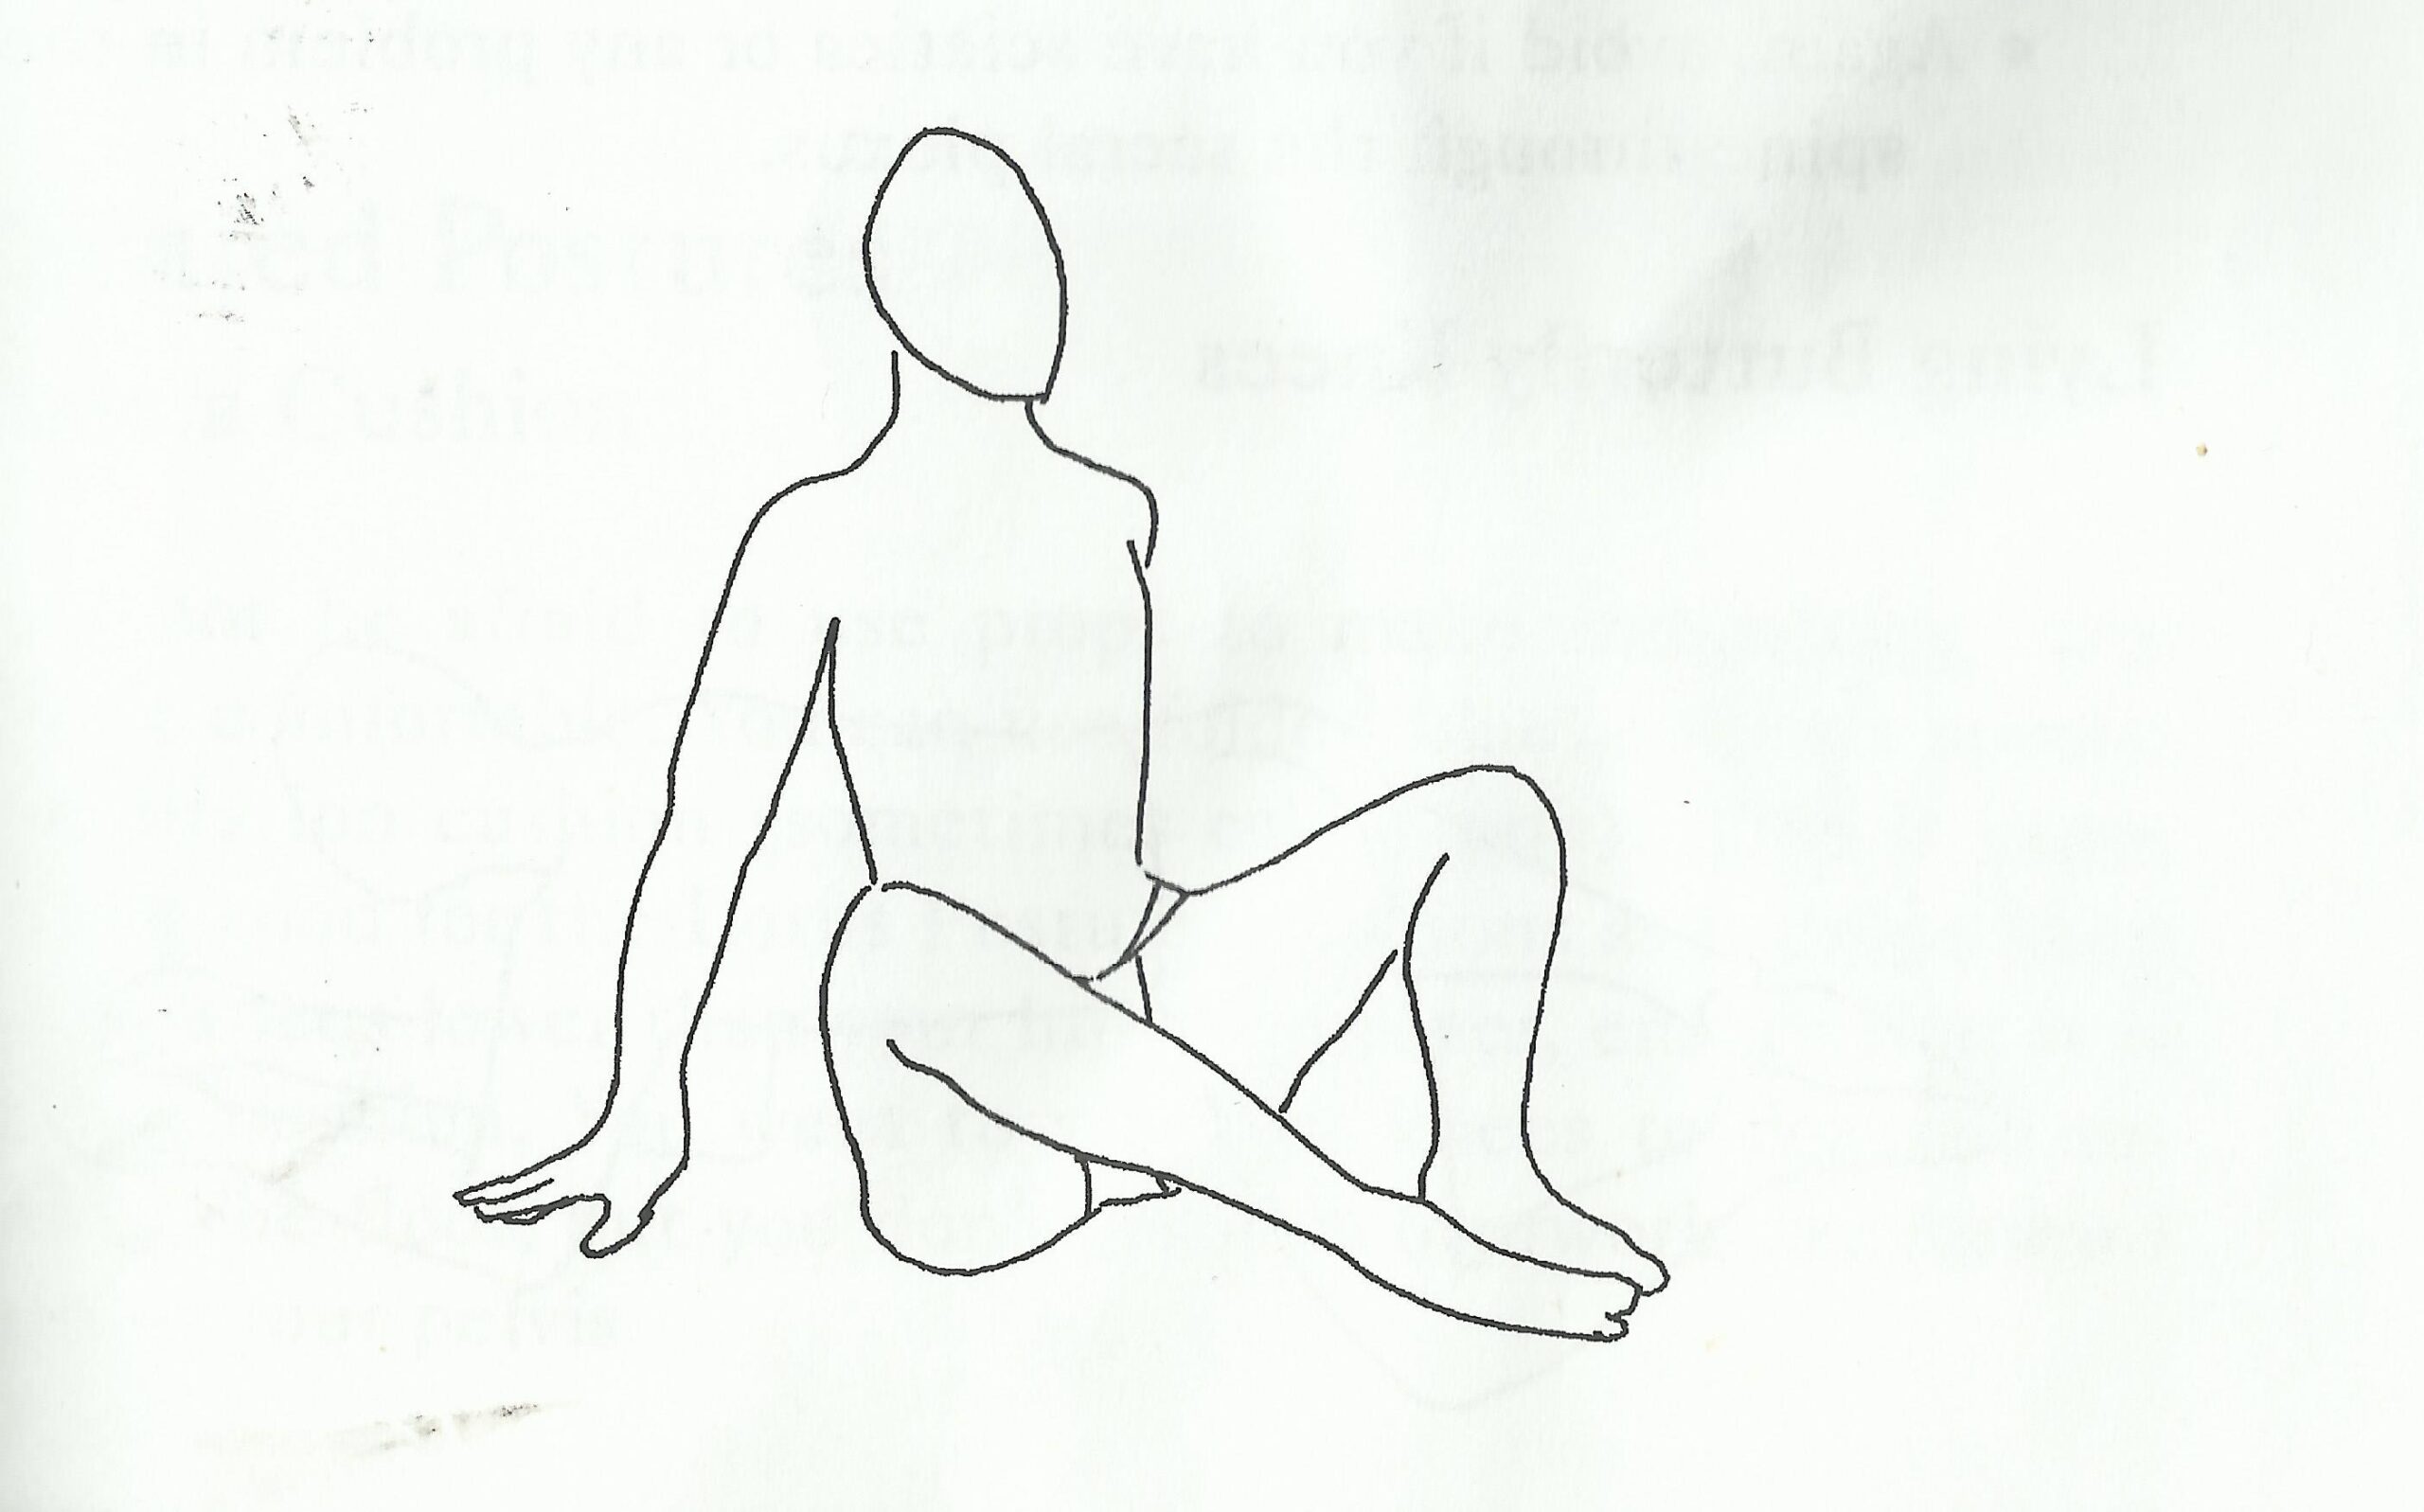
Sit with your knees bent and the soles of your feet together. Hold your feet with your hands and draw them in toward the groin, then let the knees lower gently toward the floor until you feel the stretch. Move the feet a little further out if that suits you better. Gentle up-and-down movement will increase the intensity.
Working the sequence
Do these consistently and the postures open in order: Burmese, then half lotus, then full. Rushing that sequence is the one mistake here with lasting consequences — the hips take months, and the knees do not get a second chance.
If you are still putting a daily practice together, the beginner’s guide covers the breath meditation these postures are built for.